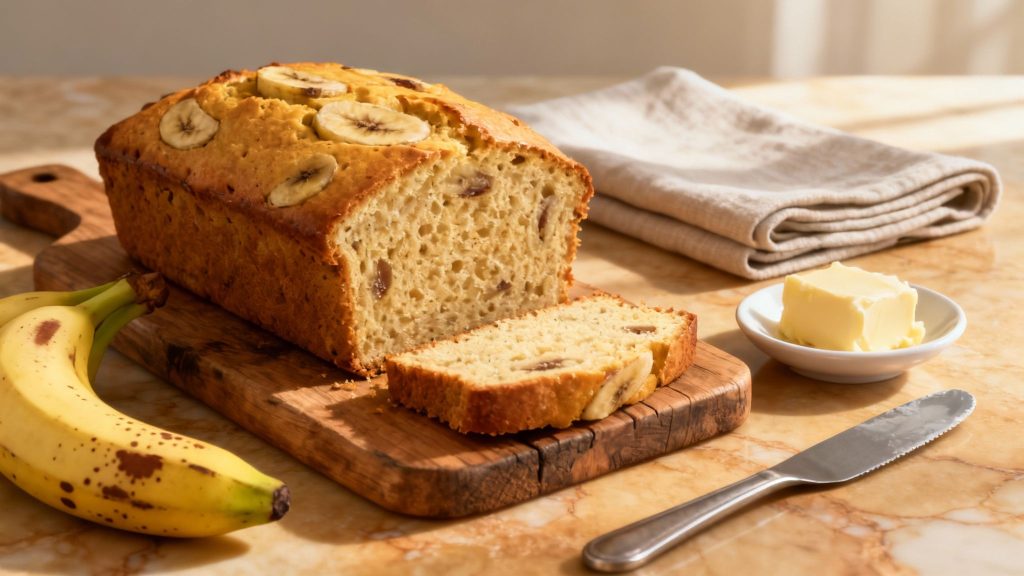
This is a definitive, no-fail banana bread recipe. It is the solution for anyone seeking a simple, reliable, and exceptionally delicious loaf. The straightforward process delivers a moist, buttery crumb and a deep banana flavor every single time. Consider it the perfect foundation for any home baker.
The Foundation of Perfect Banana Bread
There is no need for complicated techniques or specialty ingredients. The secret to a phenomenal loaf of banana bread is based on two fundamental elements: the ripeness of the bananas and the temperature of the ingredients. Understanding why these details are important allows you to bake with confidence and achieve consistent results.
This comfort food is not just a kitchen staple; it is a global favorite. The banana bread market has seen significant growth, now valued between USD 1.14 billion and USD 1.51 billion. It appears everyone is craving familiar, wholesome baked goods. North America leads this trend, accounting for approximately 33.4% of that global revenue, which demonstrates the popularity of this classic treat. You can explore more on the rise of banana bread’s popularity to review the data.
To master this recipe, it is helpful to understand the function of each ingredient. The key components and their roles in creating the perfect loaf are detailed below.
Key Ingredients and Their Purpose
| Ingredient | Primary Role in the Recipe | Professional Tip |
|---|---|---|
| Overripe Bananas | Provides sweetness, moisture, and the signature banana flavor. | The darker and spottier, the better. This is the source of the deep, rich flavor. |
| All-Purpose Flour | Creates the structure and body of the bread. | Measure by spooning it into a measuring cup and leveling it off. Scooping directly can pack it too tightly. |
| Unsalted Butter | Adds richness, flavor, and a tender texture. | Using unsalted butter allows for precise control over the final loaf’s salt content. |
| Eggs | Act as a binder, holding everything together while adding moisture and structure. | They also contribute to leavening, giving the bread lift. |
| Baking Soda | The leavening agent that reacts with the acidic bananas to create a light, airy crumb. | Always check the expiration date. Expired baking soda will not provide the necessary rise. |
Knowing the “why” behind these ingredients contributes to becoming a better, more intuitive baker. It is the difference between simply following steps and truly understanding the craft.
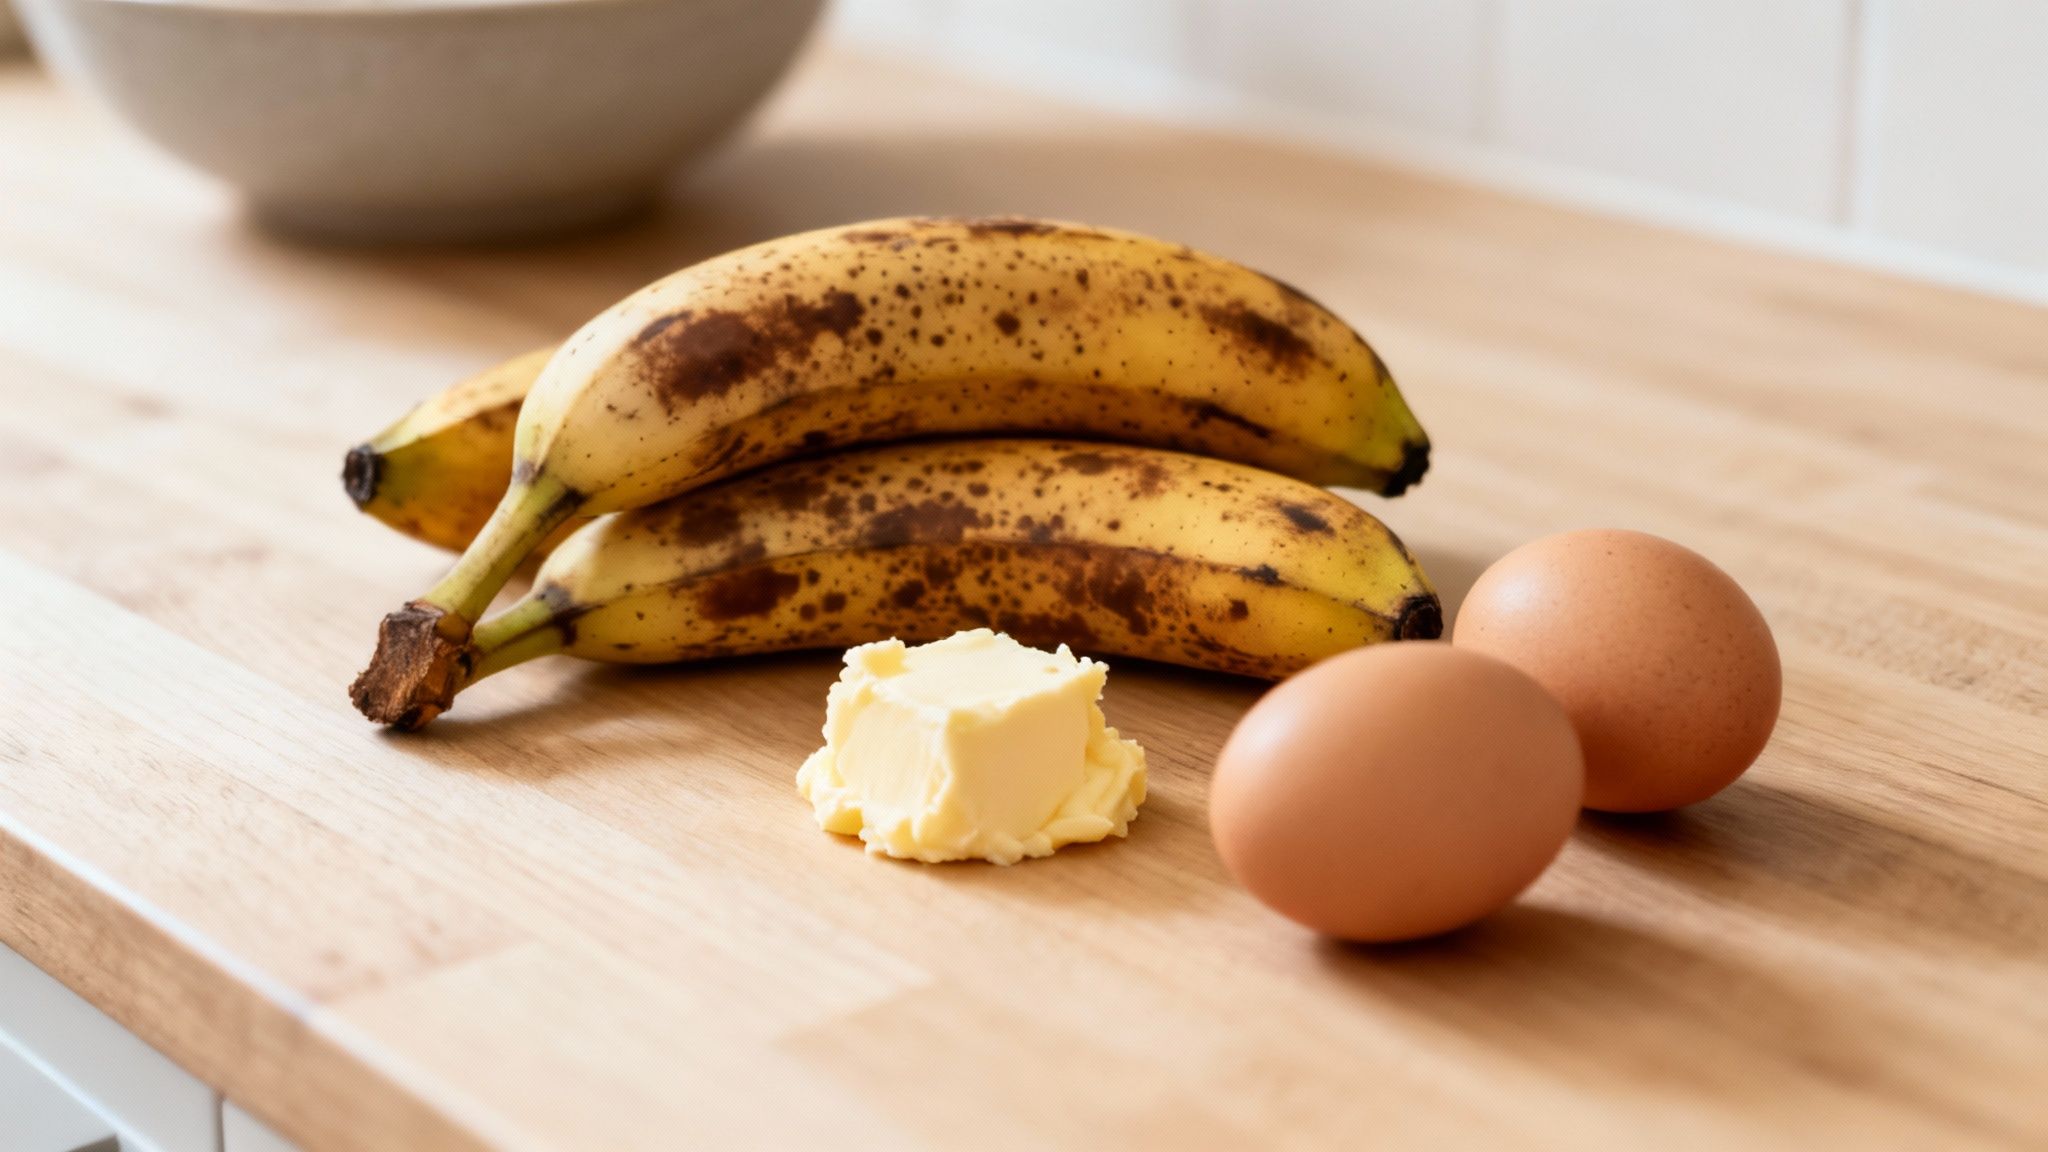
The Critical Role of Ripe Bananas
The most important ingredient is also the one most often misunderstood. Those heavily speckled, nearly black bananas are not just usable—they are essential.
- Peak Sweetness: As bananas ripen, their starches convert to sugar. This natural process yields a deep, complex sweetness that granulated sugar cannot replicate.
- Superior Moisture: The fruit breaks down as it ripens, resulting in more liquid. That liquid translates directly into a moist, tender crumb in the finished loaf.
- Intense Flavor: Ripening develops the aromatic compounds characteristic of banana bread. Using yellow or slightly green bananas will result in a bland, starchy loaf.
Why Room Temperature Ingredients Matter
While it may seem like a fussy, skippable step, bringing butter and eggs to room temperature is non-negotiable for optimal results. The science of baking supports this practice.
Cold ingredients do not combine properly. Attempting to cream cold butter with sugar results in a dense, lumpy mixture. Room-temperature butter, however, whips into a light, fluffy base that incorporates air, which is the secret to a soft, beautifully baked crumb.
Taking time to prepare the ingredients pays off. Simply leave the butter and eggs on the counter for about an hour before mixing. This ensures a smooth, well-combined batter, preventing a dense or greasy texture.
Getting Set Up for a Perfect Loaf
Any seasoned baker will confirm that a successful baking session begins long before the first ingredients are mixed. Taking a few minutes to organize the kitchen is essential. This is not just about tidiness; it is about setting up for a smooth, stress-free process.
This practice is known as mise en place—a French term meaning “everything in its place.” By gathering tools and measuring ingredients beforehand, you replace a frantic scramble with a focused, methodical experience.
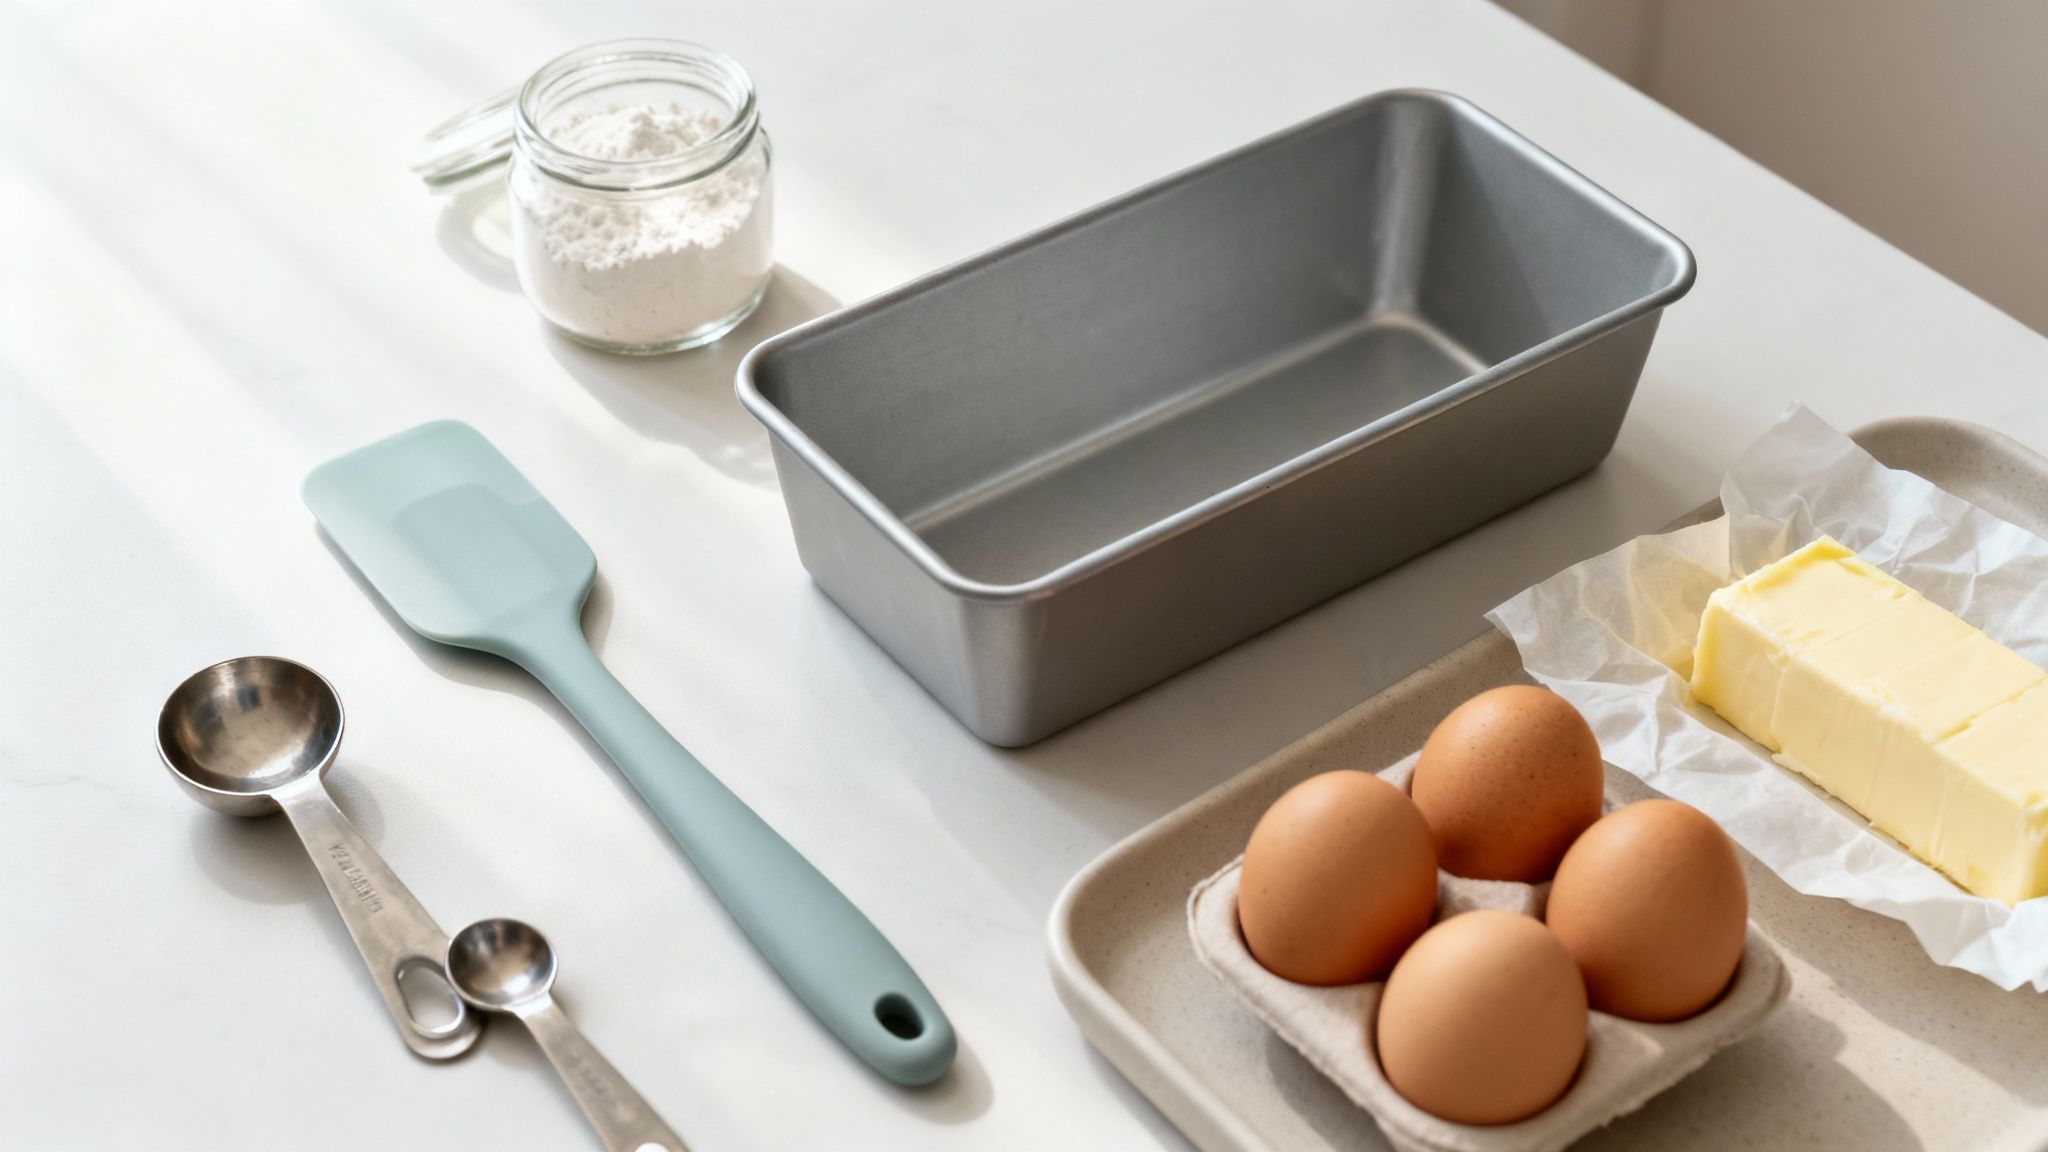
Essential Baking Tools
You do not need a high-end kitchen to bake incredible banana bread, but a few key pieces of equipment make a significant difference. Here is what is needed for this banana bread recipe basic.
- A Standard 9×5 Inch Loaf Pan: This is the classic size for a reason—it promotes even baking from the crust to the center. If your pan is a different size, monitor the baking time accordingly. A smaller, deeper pan will likely need more time, while a larger, shallower one may be done sooner.
- Mixing Bowls: At least two are recommended. One for dry ingredients and another for wet. Keeping them separate is key to preventing overmixing.
- A Flexible Spatula: This is an underrated tool in baking. A quality spatula ensures every bit of batter makes it into the pan, leaving no waste.
A helpful technique for refrigerated eggs is to place them in a bowl of warm water for five minutes. Room-temperature eggs blend more smoothly into the batter, which results in a better, more uniform texture.
The Heart of the Matter: Your Ingredients
While the right tools are helpful, the ingredients truly define your banana bread. The basic components are a testament to simple perfection. Bananas are the star, of course. They are grown in approximately 135 countries, with India alone producing 29.7 million tons annually. Beyond the fruit, it is all about the humble trio of flour, sugar, and fat. These are the same building blocks bakers rely on everywhere, as you can see if you explore the global banana bread market.
For our recipe, a couple of smart choices will elevate your bread from good to great.
Always opt for real, unsalted butter instead of margarine or shortening. The flavor is richer, and it creates an unbelievably tender, melt-in-your-mouth crumb. Butter’s fat content is crucial for a moist loaf, and using unsalted allows you to control the seasoning so the banana and spice flavors can shine.
Now that your station is prepped and your ingredients are ready, you are all set. This preparation makes the process easier and more enjoyable. You can now focus on the joy of baking.
How to Make Perfect Banana Bread, Step by Step
This is where the process begins. This guide will walk you through the entire method, from the first measurement of flour to removing the finished loaf from the oven. These are the techniques that distinguish good banana bread from great banana bread.
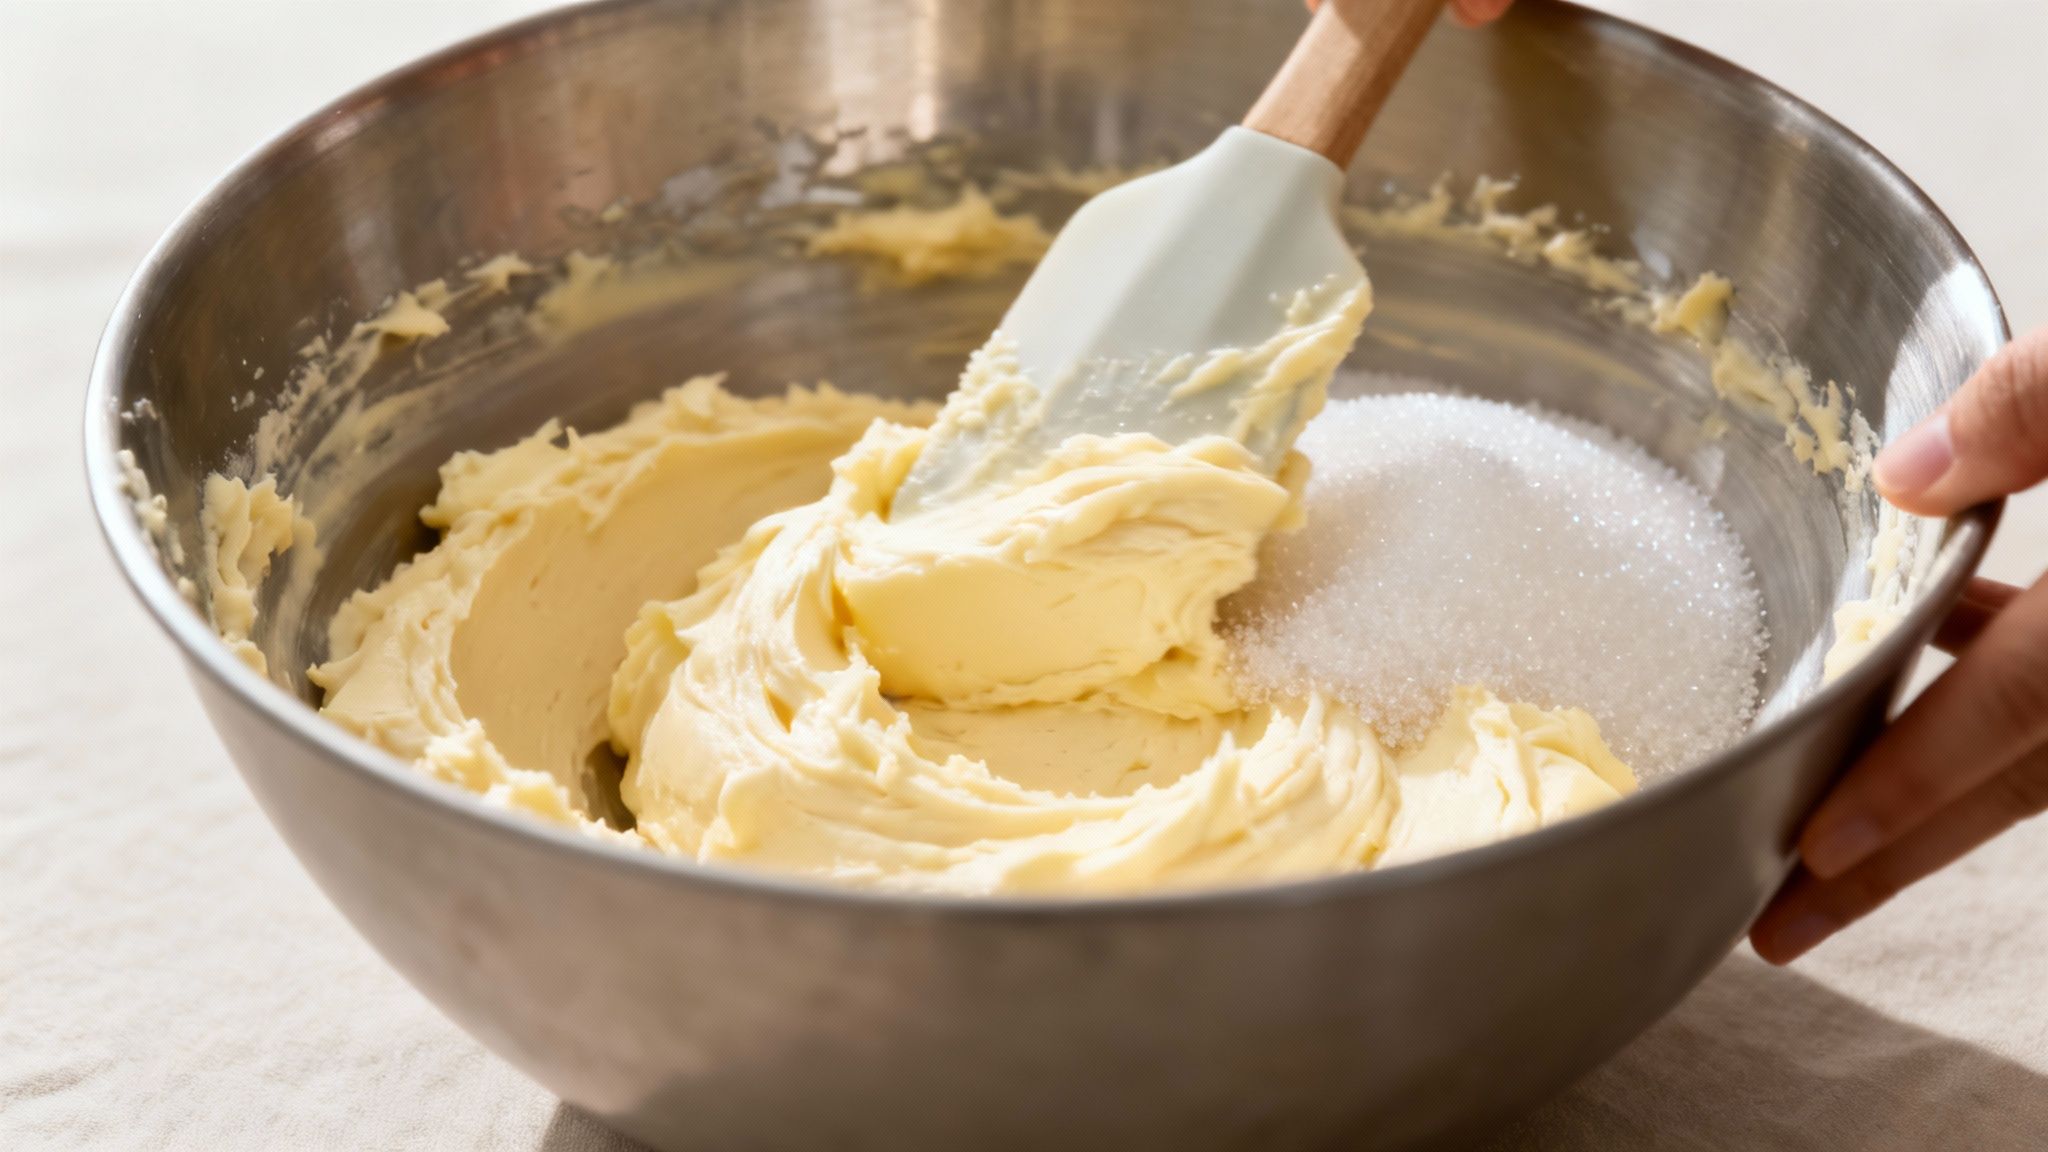
We begin with the most important step for a tender loaf: creaming the butter and sugar. This is more than just mixing them. When you beat soft butter with brown sugar, you create thousands of tiny air pockets. This aerated foundation is what gives the finished bread its light, delicate crumb.
Getting That Creamed Base Just Right
First, take your softened unsalted butter and brown sugar. Beat them together on a medium-high speed for a full three minutes. Do not rush this step. You are looking for a specific transformation. The mixture will go from a gritty, dark paste to a pale, light, and fluffy consistency, similar to a thick frosting.
Achieving this stage is a critical milestone. Remember to scrape down the sides of the bowl a couple of times to ensure even mixing. Many dense loaves are the result of cutting this step short. Patience here pays dividends in texture later.
Now it is time for the room-temperature eggs. Add them one at a time, beating well after each addition until it is completely incorporated before adding the next. This slow process helps create a stable emulsion, preventing the batter from looking curdled or separated. Once the eggs are fully mixed in, add the yogurt, vanilla, and mashed bananas, mixing just until everything is combined.
The goal is a smooth, unified batter. If it appears broken or separated, it is usually because the ingredients were too cold. This is why bringing everything to room temperature first is so critical for baking success.
In a separate bowl, you should have already whisked together your flour, baking soda, salt, and cinnamon. This pre-mixing is a non-negotiable step; it guarantees your leavening and spices are distributed evenly, which means a consistent rise and flavor in every slice.
The Gentle Art of Bringing It All Together
We have arrived at the most critical moment in this banana bread recipe basic: combining the wet and dry ingredients. Add the flour mixture to the wet ingredients and turn the mixer on its lowest possible speed. Mix only until there are no more visible streaks of dry flour. Do not mix any longer.
This is where you must resist the urge to overmix—the number one cause of tough, gummy banana bread. As soon as flour meets liquid, gluten begins to form. Gluten is ideal for a chewy, crusty loaf of sourdough, but it is the enemy of a tender quick bread.
It is best to stop the mixer while a few wisps of flour are still visible. Then, use a flexible spatula to finish the job by hand with a few gentle folds. This gives you complete control and makes it impossible to overwork the batter.
- Fold, Don’t Stir: Scrape from the bottom of the bowl and fold the batter up and over itself in a gentle motion.
- Know When to Stop: The moment you no longer see dry flour, you are done. The batter will appear thick, perhaps even a little lumpy, which is perfect.
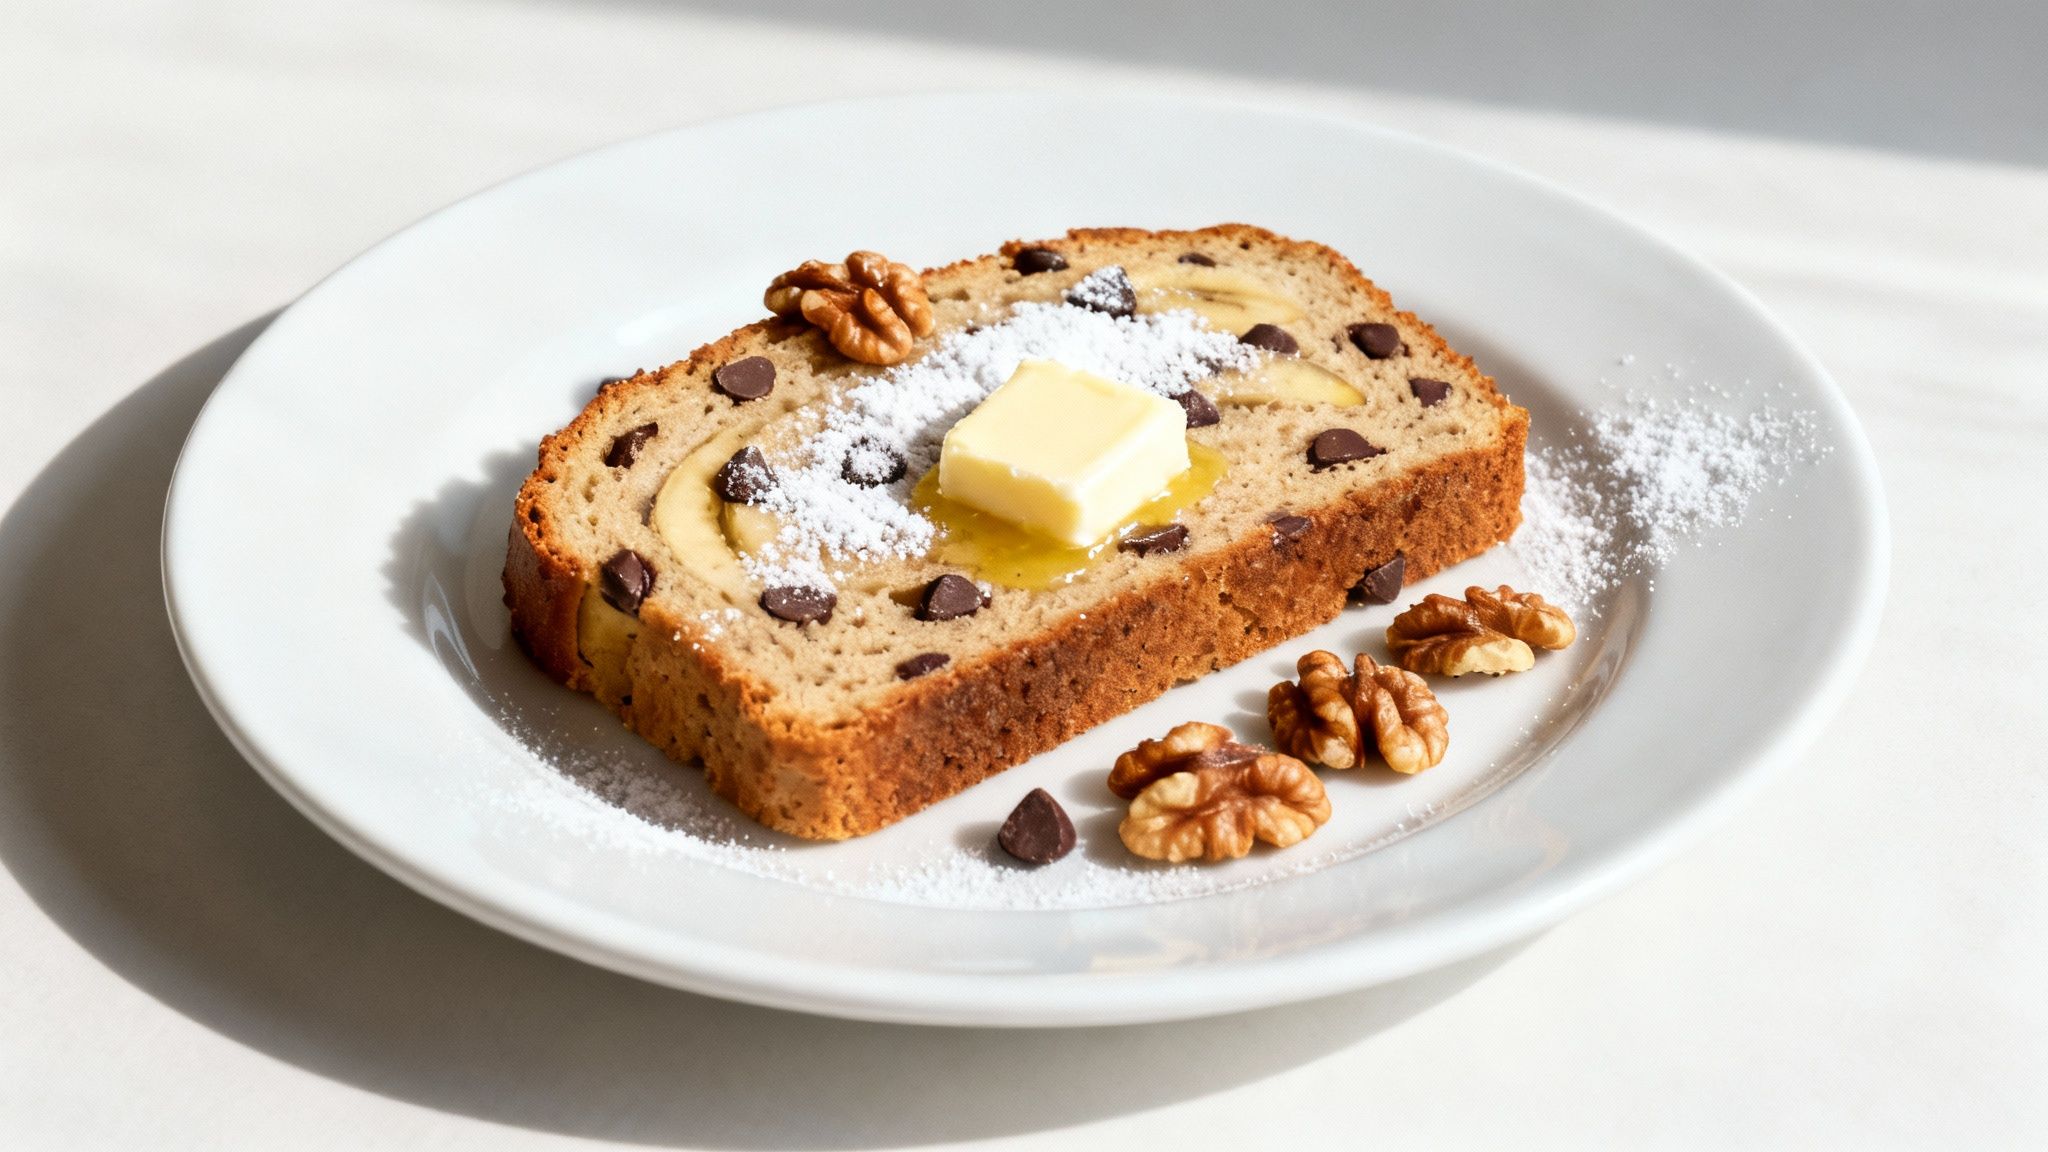
- Fold in Your Extras: If you are using chocolate chips or walnuts, now is the time to fold them in during these last few turns of the spatula.
Once the batter is ready, pour it into your prepared loaf pan and gently smooth the top. It is now ready for the oven. By properly creaming the base and then mixing with a light hand, you have set your bread up for success.
Troubleshooting Common Banana Bread Problems
https://www.youtube.com/embed/zPjVoGhHG2I
Even with a reliable banana bread recipe basic, issues can arise. Many have experienced pulling a beautiful-looking loaf from the oven, only to have it sink in the middle or turn out dense. These issues are frustrating but are almost always fixable with small adjustments.
Identifying what went wrong is the first step to ensuring your next loaf is successful. Most of the time, the culprit is one of two things: inaccurate measurements or an incorrect oven temperature.
For example, the classic sunken middle is usually a sign of an underbaked loaf. The bread’s internal structure did not have enough time to set before being removed from the oven, so it could not hold its shape as it cooled. This is where oven temperature is critical.
Why Is My Banana bread Gummy or Dense?
This is the most common issue. A heavy, dense loaf almost always results from two things: overmixing the batter or using too much flour. Once flour is added to wet ingredients, gluten development begins. A small amount of gluten is good, but too much makes the bread tough and chewy instead of tender and moist.
Excess moisture can also be the problem. If your bananas are extra large or the yogurt is not drained, it can throw off the batter’s balance, leading to a heavy crumb that does not bake through properly.
The key to a light, tender texture is precision. It is highly recommended to use a kitchen scale. Measuring cups can easily add 15-20% more flour than needed due to compaction. Switching to a scale is a significant improvement.
It is not surprising more people are encountering these issues. During the pandemic, interest in banana bread surged by 54% globally as people sought comfort in their kitchens. With a documented 30% rise in home baking overall, many are learning the fundamentals—and troubleshooting is a crucial part of becoming a better baker.
What About Dryness or Uneven Baking?
On the other hand, there is the problem of a dry loaf. This is usually from overbaking or an oven that runs hotter than indicated. An unreliable oven can also produce a loaf that is burnt on top but raw in the middle.
Familiarity with your oven is key. Most home ovens are off by a few degrees, which is enough to affect a bake. Taking the time to learn how to calibrate your oven thermometer will result in perfectly baked goods every time.
Here are some quick fixes for the most common issues.
- Sunken Middle: Ensure your oven is fully preheated before the pan goes in. Test for doneness by inserting a toothpick into the center—it should come out with a few moist crumbs, not wet batter.
- Gummy Texture: This is a matter of technique. Mix your dry ingredients into the wet ones only until they are just combined. A few streaks of flour are acceptable. Fold the rest in gently with a spatula.
- Beautiful Domed Top: Achieving a bakery-style dome comes from a combination of well-creamed butter and sugar, fresh baking soda, and the correct oven temperature.
When things do not go as planned, it can be discouraging. But every baker has had these moments. The following troubleshooting table can help you pinpoint what may have happened and how to succeed on your next attempt.
Common Banana Bread Issues and How to Fix Them
| Problem | Likely Cause | How to Fix It Next Time |
|---|---|---|
| Sinks in the Middle | Underbaked; oven door opened too early. | Bake for 5-10 more minutes. Test with a skewer—it should come out with moist crumbs, not wet batter. Avoid opening the oven door during the first 40 minutes. |
| Gummy or Dense Texture | Overmixing the batter; too much flour. | Mix dry ingredients until just combined. A few flour streaks are okay. Use a kitchen scale to weigh your flour for accuracy. |
| Dry and Crumbly | Overbaked; not enough fat or moisture. | Check for doneness 5-10 minutes before the recipe indicates. Ensure you are using full-fat butter and sour cream/yogurt. |
| Burnt Top, Raw Middle | Oven temperature is too high. | Lower your oven temperature by 25°F (15°C). Tent the loaf with aluminum foil halfway through baking to prevent over-browning. |
| Doesn’t Rise Much | Expired leavening agents (baking soda/powder). | Check the expiration date on your baking soda and baking powder. Test baking soda by adding a pinch to vinegar—it should fizz immediately. |
Remember, diagnosing these issues is not just about fixing one loaf. It is about learning the principles behind the recipe, which will make you a more confident and intuitive baker.
Taking Your Banana Bread to the Next Level
Once you have mastered this classic recipe, you can begin to experiment. Think of this loaf as a blank canvas—a solid, delicious starting point for creative variations.
The best part is that you do not have to overhaul the recipe. By folding in a few extra ingredients right before baking, you can completely change the character of the bread. Here are a few reliable favorites.
Classic Add-Ins for More Flavor and Crunch
These are popular additions for a reason. They are simple, complement the banana flavor beautifully, and are generally very well-received.
- Toasted Nuts: To add texture, it is always recommended to toast the nuts first—it makes a significant difference. Toss ¾ cup of roughly chopped walnuts or pecans in a dry skillet over medium heat for a few minutes until fragrant. Let them cool, then fold them into the batter.
- Chocolate Chips: For a more decadent, dessert-like bread, stir in 1 cup of semi-sweet chocolate chips. They create pockets of melted chocolate that are irresistible.
- Cinnamon-Sugar Swirl: This variation looks impressive but is easy to execute. Mix 2 tablespoons of sugar with 1 teaspoon of cinnamon. Pour half the batter into the loaf pan, sprinkle the cinnamon sugar over it, then top with the rest of the batter. A gentle swirl with a butter knife creates a beautiful ribbon of spice.
Unexpected Twists and How to Serve It
For those feeling more adventurous, a small tweak can add a surprising depth of flavor. A favorite technique is to add a teaspoon of instant espresso powder along with the dry ingredients. It does not make the bread taste like coffee; instead, it deepens the other flavors and adds a rich, complex background note, especially when paired with chocolate chips.
Serving banana bread is almost as important as baking it. While a warm slice is comforting on its own, a simple topping can elevate it from a humble snack to a special treat.
The key is contrast. Consider pairing the warm, sweet bread with something cool, creamy, or slightly salty.
- Quality Salted Butter: This is the ultimate classic. A thick slice of warm, toasted banana bread with a generous smear of high-quality salted butter is perfection.
- A Dollop of Cream Cheese: The slight tang of cream cheese cuts through the sweetness of the bread, providing a flavor profile similar to carrot cake.
- A Drizzle of Honey or Maple Syrup: To enhance the comforting qualities, a light drizzle of local honey or real maple syrup is fantastic. It soaks into the warm bread and complements its flavors.
With a few simple ideas, you can turn one basic recipe into a treat that is perfect for a morning coffee, an afternoon snack, or a simple dessert.
Storing and Freezing Your Banana Bread
You have baked the perfect loaf. Now, how do you keep it tasting fresh? The absolute key is to let it cool completely before wrapping it. Patience is essential here—trapping steam will result in a soggy loaf.
Once it is at room temperature, wrap it snugly in plastic wrap or aluminum foil. This simple step will keep it moist on the countertop for several days.
For longer-term storage, the freezer is your best friend. Freezing individual slices is a highly effective method. It is a game-changer for mornings when you need a quick, comforting treat without committing to a whole loaf.
How to Freeze It Like a Pro
Proper wrapping is everything. The goal is to prevent freezer burn, and a double layer is your best defense.
- The Double-Wrap Method: First, wrap each slice (or the whole loaf) tightly in plastic wrap. Then, follow with a sturdy layer of aluminum foil or place it in a freezer-safe zip-top bag, squeezing out as much air as possible.
- Don’t Forget to Label: Use a marker to write the date on the package. The banana bread will be at its best quality if consumed within 3-4 months.
When you desire a slice, simply remove it from the freezer. You can let it thaw on the counter or warm it gently. A toaster oven is perfect for restoring slightly crispy, caramelized edges. If you’re in a hurry, a short time in the microwave will restore its soft, just-baked texture.
For anyone serious about baking and food preservation, understanding your equipment is crucial. It is worth looking into the different types of freezers for long-term storage to learn how you can best preserve your creations.
Got Questions? I’ve Got Answers
Even with the most straightforward recipe, questions often arise. Here are answers to some of the most common banana bread inquiries.
Can I Use Frozen Bananas?
Absolutely. In fact, it is an excellent method for having perfectly ripe bananas ready at any time.
Be sure to thaw them completely on the counter first. You will notice a brownish liquid pool in the bowl—drain all of this liquid off before mashing. If you skip this step, you risk adding too much moisture, which can make the final loaf heavy and gummy.
What if I Don’t Have Sour Cream or Yogurt?
That is not a problem. If you are out of sour cream or Greek yogurt, unsweetened applesauce is an excellent substitute. Simply swap it in using the same measurement. If applesauce is also unavailable, mashing in an extra 1/3 cup of banana will provide the necessary moisture.
Please note: The slight acidity in sour cream or yogurt gives the baking soda an extra boost, helping the bread rise. Using a substitute might alter the texture slightly, but the result will still be delicious.
Why Didn’t My Banana Bread Rise?
The dreaded flat loaf. In most cases, the culprit is old, inactive baking soda. It loses its potency over time, and if it has been in your pantry for a while, it may not have the power to lift the batter.
Here is a simple test: drop a small spoonful of baking soda into a little vinegar. If it fizzes vigorously, it is still active. If there is little to no reaction, it is time to purchase a fresh box.
Here at Social Life Magazine, we are dedicated to perfecting life’s simple pleasures, from a warm slice of banana bread to a chic Hamptons get-together. Explore more recipes, style inspiration, and event exclusives at https://www.sociallifemagazine.com.
Author
Written by
Recent Posts

Cynthia Erivo Net Worth: The Voice That Was Always There

Inside Out 2, Wicked, and the Emotional Blockbuster That Ate 2024
7 Mindful Meal Prep Tips for Stop Food Waste Day

Rebecca Ferguson Net Worth: The Advantage of Not Being the Lead
What Makes a Dinner Party Truly Unforgettable (Hint: It’s Not the Food)
Categories
- Art
- Articles
- Beauty & Skincare
- Celebrities
- Celebrities|Entertainment
- Celebrities|Television
- Celebrities|The Chronicles
- celebrities|the-archive
- Chronicles
- Entertainment|Culture
- Event Photos
- Events
- Fashion
- Fashion & Style
- Featured
- Food & Beverage
- Food, Spirits, Wine
- Hamptons
- Hamptons Celebrities
- Hamptons Celebrities|Celebrities|The Chronicles
- Health
- Health & Beauty
- Lifestyle
- Luxury Lifestyle
- Movies
- Press
- Profiles
- Real Estate
- Technology
- The Chronicles
- Travel
- Uncategorized
- Weddings