
Gauge selection is one of the first decisions a piercer makes before touching a client’s ear. Choose too thin and the tissue heals around a smaller channel than intended. Choose too thick without reading the anatomy and you risk unnecessary trauma. This guide covers exactly what gauge to use for an earlobe piercing, what needle type to pair it with, and why anatomy changes the equation every time.
Understanding the Gauge System: Why Higher Numbers Mean Smaller Needles
Most people assume a 20g needle is bigger than a 14g. It is the opposite. The gauge system originates from the American Wire Gauge (AWG) standard, originally designed for electrical wire. The number reflects how many times the wire was drawn through a die to make it thinner. More draws equal a higher number equal a narrower diameter. Body piercing adopted the same convention, which is why the gauge system can feel counterintuitive at first.
For piercers and clients alike, the practical takeaway is straightforward: lower gauge number equals a thicker needle. A 14g needle is noticeably thicker than an 18g needle, and that difference directly impacts wound channel quality and healing outcome.
The Core Gauge Range for Earlobe Piercing
The table below covers the four gauges most relevant to earlobe work, with millimeter and inch conversions alongside their typical use cases.
| Gauge | Diameter (mm) | Diameter (inch) | Common Use Case |
| 20g | 0.8 mm | 0.032″ | Gun piercing; thin or pediatric lobes; delicate starter jewelry |
| 18g | 1.0 mm | 0.040″ | Gun standard; entry-level professional; upper lobe placements |
| 16g | 1.2 mm | 0.047″ | Professional standard; most adult lobe types; APP-aligned approach |
| 14g | 1.6 mm | 0.064″ | Professional preferred; thick lobes; clients planning future stretching |
16g and 14g represent the professional standard for initial lobe piercings. The 0.8mm difference between 20g and 14g is small in absolute terms but significant for wound channel stability and long-term healing quality.
Professional Piercer Standard vs. Gun Piercing: The Gauge Gap and Why It Matters
This is the source of most gauge confusion. A client pierced at a mall kiosk walks in with an 18g or 20g channel. A professional studio pierces at 16g or 14g. When they ask why the numbers are different, the answer comes down to the tool, not preference.
Why Professional Piercers Default to 14g and 16g
A hollow needle removes tissue cleanly to create a defined channel. The resulting wound is precise and the same width as the needle throughout. This matters for two reasons. First, a thicker initial channel supports a more stable healing environment. Thicker jewelry moves less inside the healing tissue, reducing irritation. Second, 14g and 16g posts are heavy enough to resist the “cheese-cutter effect,” where thin jewelry under pressure from movement or heavy earrings gradually migrates through soft tissue.
Gun piercings use the earring itself as the piercing tool. The post tip is sharpened, but it blunts quickly and pushes through tissue rather than cutting cleanly. The resulting channel is irregular, and the post is typically 18g to 20g. These thinner posts are more prone to migration over time, especially as the client ages and lobe tissue thins.
When 18g Is Still Appropriate for Professional Use
Thinner gauge is not automatically wrong. There are clinical scenarios where 18g is the right call: lobes under 4mm in thickness, pediatric clients, very small upper lobe placements, or clients who have explicitly requested delicate starter jewelry with no plan to stretch. The key is that the decision is anatomy-driven, not default.

The Anatomy Rule: How Lobe Thickness Changes the Gauge Decision
No single gauge is correct for every client. Lobe thickness is the most important variable in the gauge decision, and it is the factor most frequently skipped by consumer-facing guides that treat earlobe piercings as a single scenario.
Measuring Lobe Thickness Before You Pierce
A simple caliper check before marking the piercing site takes seconds and prevents complications. Lobes under 4mm in thickness carry a meaningfully higher risk of split-lobe development over time, particularly if the client wears heavy earrings. The Association of Professional Piercers (APP) specifically recommends discussing this risk with clients whose lobes are under the 4mm threshold before proceeding.
Gauge Recommendations by Lobe Anatomy
The table below maps anatomy to gauge recommendation for initial lobe piercings.
| Lobe Type | Thickness | Recommended Starting Gauge |
| Thin lobe | Under 4mm | 18g; counsel client on split-lobe risk with heavy jewelry |
| Average lobe | 4 to 7mm | 16g standard; suitable for most adult clients |
| Thick lobe | Over 7mm | 16g or 14g; confirm adequate jewelry post clearance |
| Upper lobe (doubles) | Varies, smaller mass | 18g common; assess placement size before defaulting to 16g |
Thin lobes under 4mm are the highest-risk category and warrant a separate client conversation. Thick lobes above 7mm benefit most from 14g due to the improved channel stability a wider post provides.
Needle Type for Earlobe Piercing: Straight, Cannula, or Curved?
Gauge is the measurement. Needle type is the execution. Both decisions need to be made together, but needle type is almost entirely absent from consumer-facing gauge guides because jewelry retailers have no stake in needle selection. For professional piercers, understanding which needle type to pair with a given gauge is part of technique, not just preference.
Straight Hollow Needle: The Default Choice for Lobes
A straight hollow needle is the industry standard for earlobe piercings. Soft lobe tissue lies flat, the entry angle is straightforward, and jewelry follow-through after needle withdrawal is clean and predictable. Tri-bevel tips create a precise incision with minimal tissue trauma, resulting in a smooth channel that heals faster and with less risk of irritation bumps. For most lobe scenarios, a straight needle in the correct gauge is the only tool needed. See our full range of professional body piercing needles available in sterile, individually sealed packs.
Cannula Needle: When to Consider It for Lobes
A cannula needle has a flexible plastic sheath over the hollow needle. After the needle passes through, the sheath remains in the channel, functioning as a guide for jewelry insertion. Cannula technique is common in European piercing practice and is useful in specific lobe scenarios: clients with difficult post-insertion anatomy, piercers who prefer the controlled jewelry load-in for thicker initial jewelry, or studio workflows where cannula technique is the trained standard. It is not a default for routine lobe piercings but is a legitimate and effective option.
Why Curved Needles Are Rarely Used for Standard Lobes
Curved needles follow the natural arc of rounded anatomy, which makes them well-suited for rook, daith, and some genital placements. The earlobe is flat, soft tissue with a straightforward entry path. A curved needle offers no advantage here and adds unnecessary complexity to an otherwise simple placement. Stick to straight for standard lobes.

Matching Needle Gauge to Jewelry Gauge: The Non-Negotiable Rule
Piercing with a 16g needle and inserting an 18g post is a common and easily preventable mistake, particularly in studios where needle stock and jewelry inventory are managed separately. The healing channel contracts around whatever jewelry is inside it. If the jewelry is narrower than the needle used to create the channel, the tissue heals down to the jewelry size, not the needle size.
The downstream consequence: a client pierced at 16g who has worn 18g posts for six months now has an effective 18g channel. If they later try to wear a 16g piece, the insertion causes unnecessary trauma. More seriously, thin jewelry under tension creates the cheese-cutter effect mentioned earlier. A gauge-matched setup from day one eliminates both problems. The needle gauge dictates the jewelry gauge. This applies to initial piercings and repiercing scenarios equally.
Special Scenarios: Future Stretching, Re-Piercings, and Second-Lobe Placements
Standard first-lobe situations are covered by the guidance above. Three common variations require adjusting the default gauge logic before the piercing, not after.
If the Client Plans to Stretch Later
A client who wants to stretch their lobes over time benefits from starting at 16g minimum, with 14g preferred. Starting at 20g adds two extra stretch steps before reaching the 16g baseline where most stretching journeys begin in earnest. Starting at 14g means the very first downsize move goes to 12g rather than requiring multiple intermediate sizes.
Re-Piercing a Closed or Partially Closed Lobe
Scar tissue from a previous piercing changes the texture and resistance of the lobe at the former channel site. Depending on how long the original piercing was worn and how completely the channel closed, the tissue may be denser and less pliable than surrounding lobe tissue. Assess visually and by palpation before marking the new placement. If scar tissue is significant, 16g is often preferable over 14g to reduce insertion resistance. Place the new piercing slightly away from the scarred center if the scar tissue is irregular or raised.
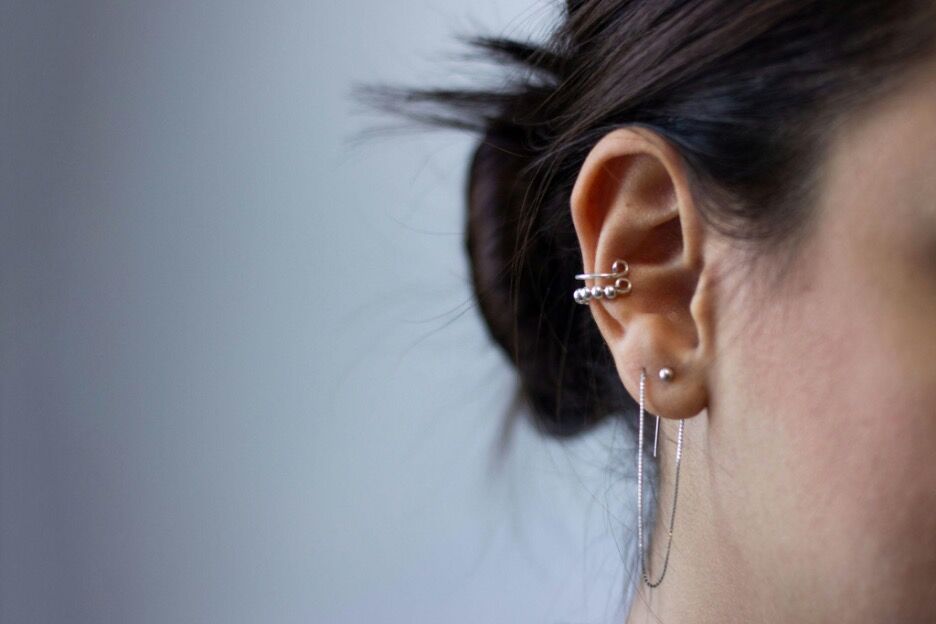
Upper Lobe (Second or Third Lobe Placement)
The upper lobe sits above the standard lobe position and presents the same soft tissue type but with a smaller tissue mass. Most piercers use 18g here, though anatomy still governs the decision. A very fleshy upper lobe may support 16g comfortably. A tight, thin upper lobe position warrants 18g. For clients building out a full ear configuration, factoring gauge consistency across multiple placements simplifies jewelry management later.
Final Notes
Gauge selection for an earlobe piercing comes down to three things: piercing method, lobe anatomy, and intended jewelry. Professional piercers default to 16g or 14g with a straight hollow needle for most clients. Anatomy assessments, re-piercing scenarios, and future stretch plans shift that baseline. When the decision is genuinely unclear, sizing up rather than down provides a more stable healing foundation. The channel can always be downsized with time. Reversing migration or rejection is considerably harder.
Note: These are professional guidelines based on industry standards. Always assess individual client anatomy and consult with a certified piercing mentor or APP member for complex cases.
Author

Written by
Recent Posts
What Size Needle for Ear Lobe Piercing: Gauge Chart, Needle Types & the Anatomy Rule
8 Hidden Truths About CBD You Should Know
How Do You Check a Pre-Loved Jewelry Condition Before Purchase?
The Reliability Professional Roofers in Tuscaloosa Bring to Residential Projects
How Professional Roofing Services in Maple Grove Can Help With Energy Cost Reduction
Categories
- Art
- Articles
- Beauty & Skincare
- Celebrities
- Celebrities|The Chronicles
- Chronicles
- Event Photos
- Events
- Fashion
- Fashion & Style
- Featured
- Food & Beverage
- Food, Spirits, Wine
- Hamptons
- Hamptons Celebrities
- Health
- Health & Beauty
- Lifestyle
- Luxury Lifestyle
- Press
- Profiles
- Real Estate
- Technology
- The Chronicles
- Travel
- Uncategorized
- Weddings