
Selecting the ideal zinnia seeds is the foundational step toward cultivating a garden filled with vibrant color. The key to success is matching the right plant—considering its height, bloom style, and color—to your garden's specific design. Proper selection ensures a beautiful and prolific season.
Choosing the Right Zinnia Seeds for Your Garden
A stunning zinnia display begins long before planting. It starts with the careful selection of seeds. With a vast array of shapes, sizes, and colors available, the options can seem overwhelming. However, this same variety makes them incredibly versatile, suitable for any garden setting, from a large estate flower bed to a compact urban terrace container.
Understanding the differences between cultivars is essential for achieving the desired aesthetic. Each variety possesses unique characteristics, and making an informed choice ensures your garden will not only thrive but will also reflect a sophisticated design sensibility.
Decoding Zinnia Varieties
To make the best selection, it is helpful to understand the terminology on seed packets. This information describes the plant's genetics and predicts its performance.
- Heirloom Zinnias: These are classic, open-pollinated varieties passed down through generations. Seeds saved from heirloom plants will grow "true to type," meaning the subsequent plants will replicate the characteristics of their parents. This is ideal for gardeners who plan to save seeds for the following year.
- Hybrid Zinnias (F1): These cultivars are created by cross-pollinating two different parent plants to produce specific, desirable traits, such as unique colors, enhanced disease resistance, or a more compact growth habit. Seeds saved from hybrid plants are genetically unstable and typically will not resemble the parent plant, so purchasing fresh seeds each year is recommended for consistent results.
This summary outlines the main characteristics to consider when browsing for seeds.
This visual guide helps narrow down the options by illustrating different zinnia types, their typical heights, and their best applications, making it easier to match a variety to your garden's specific requirements.
Matching Zinnias to Your Garden's Purpose
One of the greatest attributes of zinnias is their adaptability. Originally from the scrub and dry grasslands of the Americas, they have been cultivated since the 19th century into over 100 distinct types. This history, which is further detailed on the Zinnia Wikipedia page, has produced a zinnia suitable for nearly every garden imaginable.
This extensive range means there is a perfect zinnia for any intended application.
For a truly luxurious, full-looking garden, the technique is to layer different heights. Utilize tall varieties like 'Benary's Giant' for the backdrop in beds, then line the front with shorter, mounding types like the 'Profusion' series. This simple method creates incredible depth and a solid wall of color.
For instance, if you are planning a cutting garden for a continuous supply of fresh bouquets, you will need tall varieties with strong, sturdy stems.
- For Cutting Gardens: Consider the 'Benary's Giant' series. These plants can grow up to 40 inches tall and produce massive, dahlia-like flowers in a wide spectrum of colors. The 'Oklahoma' series is another excellent choice, providing smaller but incredibly prolific double blooms on durable stems.
- For Containers and Borders: For smaller spaces or a neat, tidy edge for garden beds, dwarf varieties are the best option. The 'Profusion' and 'Zahara' series are standouts in this category. They are known for their exceptional disease resistance and compact, mounded shape (approximately 12-18 inches), and they bloom continuously.
- For Unique Colors and Textures: To add a distinctive element, look for more unusual cultivars. The 'Queen Lime' series, with its antique chartreuse and blush tones, adds an immediate touch of elegance. The 'Zinderella' series features fascinating scabiosa-type blooms with a frilly center that brings a completely different texture to the garden. These are the varieties that can elevate a floral arrangement.
To help you compare some of the most popular options side-by-side, here is a quick-reference table.
Comparing Popular Zinnia Seed Varieties
| Variety Name | Best Use Case | Typical Height | Key Features |
|---|---|---|---|
| Benary's Giant | Cutting gardens, back of the border | 30-40 inches | Large, dahlia-style blooms; very long, strong stems; ideal for bouquets. |
| Queen Lime | Designer cutting gardens, bouquets | 24-30 inches | Unique antique colors (chartreuse, blush, rose); sophisticated appearance. |
| Profusion Series | Containers, borders, mass plantings | 12-18 inches | Highly disease resistant; compact, mounding habit; continuous flowers. |
| Oklahoma Series | Cutting gardens, mixed beds | 24-30 inches | Prolific 1.5-2.5 inch double blooms; very productive; strong stems. |
| Zinderella Series | Specialty cut flowers, focal points | 24-30 inches | Unique "scabiosa" or anemone-style ruffled blooms; adds texture. |
Choosing the correct seed from the outset is the most effective way to guarantee a garden filled with color and life all season long. Whether you require a towering backdrop or a durable border plant, there is a zinnia variety perfectly suited for the task.
Starting Zinnia Seeds Indoors for Earlier Blooms
For gardens in cooler climates with a short growing season, or for those eager for the first signs of color, starting zinnia seeds indoors is an effective strategy. It is the best way to get a head start on the season. This provides strong, healthy seedlings ready for the garden as soon as the weather is favorable, which means your beds will bloom weeks ahead of schedule.

Giving seeds a protected start indoors shields them from unpredictable spring frosts and pests. It is a simple process that paves the way for a long, bountiful flowering season—essential for creating lush, layered beds that look full and established from the beginning of summer.
Timing and Essential Supplies
Timing is critical when starting seeds indoors. Starting them too early will result in lanky, root-bound plants that struggle after transplanting. Starting too late negates the advantage of an early start. The ideal window is 4 to 6 weeks before your area’s last predicted frost date. This allows seedlings sufficient time to develop a robust root system without outgrowing their containers.
Before planting, organize your supplies to streamline the process.
- Containers: Several options are available. Biodegradable peat pots are a good choice because the entire pot can be planted directly in the ground, minimizing root disturbance. Reusable plastic seed trays with clear dome lids are also effective for maintaining humidity.
- Seed-Starting Mix: Do not use soil from your garden. It is too heavy, compacts easily, and can harbor diseases. A light, sterile seed-starting mix is necessary; it provides the airy, moist environment that delicate new roots require.
- Light Source: A sunny windowsill may not provide adequate light, often producing spindly, "leggy" seedlings that stretch for light. For sturdy, compact growth, a simple fluorescent shop light or a dedicated LED grow light positioned a few inches above the seedlings is a much better option.
- Watering Can or Spray Bottle: A gentle watering method is required. A fine-rose watering can or a simple spray bottle will prevent dislodging the small seeds or damaging new sprouts.
Sowing for Success
With your supplies ready, sowing is a straightforward process. Fill your pots or trays with pre-moistened mix, leaving approximately a half-inch of space at the top to prevent spillage during watering.
Gently place one or two zinnia seeds in the center of each pot or cell. Cover them with a light layer of mix, about ¼ inch deep. Zinnias do not require light for germination, but they do require warmth.
A steady soil temperature between 74-80°F is optimal for rapid zinnia germination. Using a heat mat under seed trays is highly effective and can produce sprouts in as little as 3-5 days.
Once sown, cover your trays with their plastic dome or plastic wrap to create a miniature greenhouse effect. As soon as the first green shoots appear, remove the cover to allow for air circulation.
Avoiding Common Seedling Problems
Starting seeds indoors can present a couple of common issues, but they are easily preventable. The two primary concerns are "damping off" and "legginess."
Damping Off is a fungal disease that causes seedlings to collapse and rot at the soil line. To prevent it:
- Always use a sterile seed-starting mix.
- Remove the tray cover as soon as the seeds have germinated.
- For added protection, use a small fan on a low setting near the trays for a few hours daily to promote air movement.
Legginess occurs when seedlings grow tall and weak due to insufficient light. To grow strong, stocky plants:
- Provide at least 14-16 hours of bright, direct light each day.
- Keep the light source just 2-3 inches above the tops of the plants, raising it as they grow.
The Hardening-Off Process
Your indoor-grown seedlings are not yet ready to be planted directly into the garden. They must be slowly acclimated to outdoor conditions through a process called hardening off. This crucial step prevents transplant shock from sudden exposure to sun, wind, and temperature fluctuations.
About a week before you plan to plant them in the garden, begin the transition. On the first day, place the seedlings outside in a protected, shady spot for just one to two hours. Each subsequent day, gradually increase their time outside and expose them to slightly more direct sun. By the end of the week, they should be resilient enough to handle a full day outdoors, ready for their permanent location.
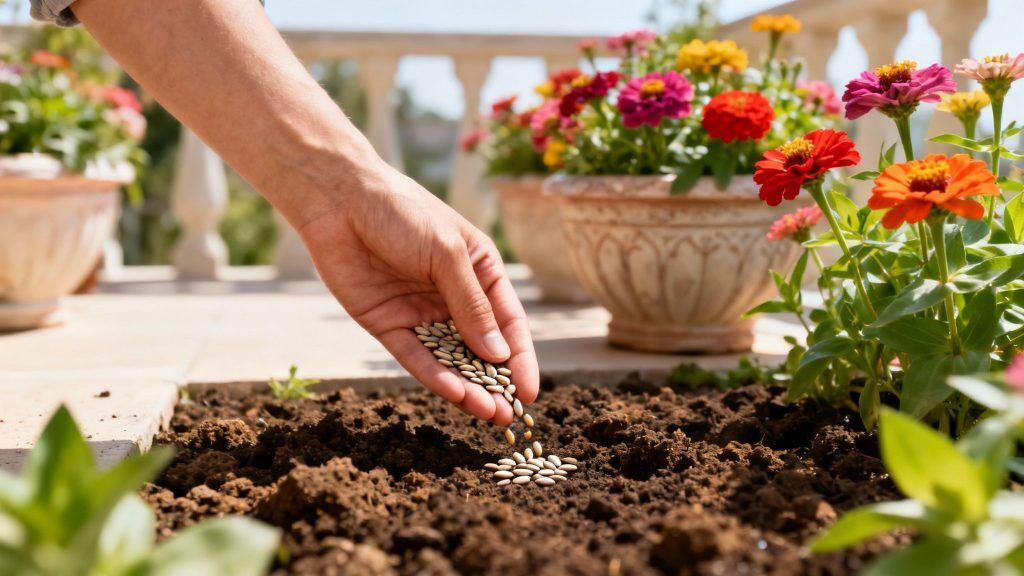
How to Direct Sow Zinnia Seeds in Your Garden
There is a simple elegance to planting seeds directly where they will grow, and for zinnias, it is an excellent method. Direct sowing aligns with the plant's natural growth cycle, encouraging deep root systems and robust, healthy development from the start. This approach eliminates the process of transplanting and allows the zinnias to establish themselves in their final location immediately.

This method is ideal for creating the sweeping, naturalistic drifts of color seen in high-end gardens. When you work with nature, the result is a stunning and surprisingly low-maintenance floral display that thrives throughout the summer.
Timing Your Sowing Perfectly
The single most critical factor for direct sowing zinnia seeds is timing. These flowers are warm-season annuals, meaning they are intolerant of cold. Planting too early is a common mistake that leads to poor germination or rotted seeds.
Wait until all danger of frost has passed completely. More importantly, the soil itself must be warm. A soil temperature of at least 70°F is recommended. For most regions, this means waiting approximately two weeks after the last frost date to ensure the ground is consistently warm.
Preparing the Ideal Seedbed
Zinnias are not particularly demanding plants, but they perform best in well-draining soil rich in organic matter. A small amount of preparation will significantly improve their performance throughout the season. The goal is to create a fine, crumbly texture that provides excellent seed-to-soil contact.
Begin by clearing the area of all weeds and debris. Then, incorporate a few inches of quality compost or well-rotted manure into the top 6 to 8 inches of soil. This not only adds nutrients but also dramatically improves soil structure, which is vital for drainage and healthy root development. Once incorporated, rake the surface smooth.
A well-prepared bed is like a perfectly primed canvas. It gives every single seed the best possible opportunity to germinate and grow into a strong, productive plant. That is the true secret to a full and luxurious flower border.
Taking the time to prepare the soil properly ensures your zinnias have everything they need to flourish. This initial effort is rewarded all season with healthier plants and more abundant blooms.
Sowing and Spacing Your Seeds
With the garden bed prepared, it is time to plant. Planting depth is key for good germination. As a general rule, sow zinnia seeds about ¼ inch deep. Planting them any deeper can cause the seedlings to struggle to reach the surface.
Spacing is equally important and depends entirely on the variety chosen. Overcrowding is a common problem that leads to competition for sun and water and, more critically, reduces air circulation, which invites fungal diseases like powdery mildew.
Follow these spacing guidelines:
- Tall Varieties ('Benary's Giant'): Space these larger plants about 12 inches apart. They require room to branch out and develop their impressive height and large blooms.
- Compact Varieties ('Profusion'): For shorter, mounding types, a closer spacing of 9 inches is ideal for creating a dense, continuous carpet of color.
After placing the seeds, gently press the soil down to ensure good contact. Water the area lightly—using a watering can with a rose attachment or a hose with a fine spray is recommended—to avoid dislodging the newly planted seeds. Keep the soil consistently moist, but not waterlogged, until the first sprouts emerge. In warm soil, this often occurs within a few days.
Keeping Your Zinnias Blooming All Season Long
Once your zinnias are established and growing, minimal upkeep is required to transform a few flowers into a stunning, season-long display. The key to a garden overflowing with color is consistent, thoughtful care. These simple habits help your plants direct their energy toward creating a continuous production of blooms.
The objective is to encourage strong roots and extensive branching, which in turn leads to more flowers. With the right approach to watering, feeding, and a couple of key pruning tasks, your zinnias will become a focal point of the garden.
The Art of Watering and Feeding
When watering zinnias, the principle is deep, infrequent watering. They are surprisingly resilient and can tolerate some dryness once established, but they will look their best with a consistent supply of moisture. Provide a thorough, long soak at the base of the plant periodically, rather than a light sprinkle daily. This encourages roots to grow deep into the soil, creating a much stronger and more resilient plant.
A common mistake is watering from overhead. This splashes soil onto the leaves and promotes fungal problems like powdery mildew. The best practice is to use a soaker hose or a watering wand to deliver water directly to the soil where it is needed, keeping the foliage dry.
Regarding feeding, zinnias have modest requirements. In fact, it is far easier to over-fertilize them than to under-fertilize.
A fertilizer that is too high in nitrogen will produce a profusion of lush, green leaves but very few flowers. The plant simply puts all its energy into foliage instead of blooms.
A light application of a balanced, low-nitrogen fertilizer (with a ratio such as 5-10-5) once a month is sufficient. It provides just enough of a boost to maintain flower production without promoting excessive leaf growth.
Pinching and Deadheading for a Fuller Plant
To maximize your zinnia harvest, two pruning techniques are essential: pinching and deadheading. Both of these actions signal the plant to redirect its energy into creating more branches and, consequently, more flowers.
Pinching is a one-time task performed when the plant is young. Once it is about 8-12 inches tall with a few sets of leaves, use snips to cut off the top few inches of the main stem, just above a leaf node. This may seem counterintuitive, but by removing the central growth tip, you force the plant to become bushier from the base. The result is a much sturdier, fuller plant that will produce significantly more blooms than if it were left to grow vertically.
Research supports this practice. Studies have shown that zinnia plants pinched at the 6-leaf stage produced a maximum yield of 12.2 flowers per plant—a substantial increase compared to unpinched plants. You can review the data from this study on zinnia cultivation practices for more information.
Deadheading, on the other hand, is an ongoing task for the rest of the season. It is the simple act of removing spent and fading flowers. If an old flower is left on the stem, the plant’s biological focus shifts to seed production. By cutting it off, you signal the plant to continue its flowering cycle, so it pushes out more blooms.
This creates a powerful and productive cycle:
- You remove a spent flower, cutting the stem back to just above a set of leaves.
- The plant responds by sending out new side shoots from that node.
- Those new stems produce fresh buds, keeping your garden in constant color.
Regularly deadheading not only keeps your zinnia patch looking tidy but is also the most effective way to ensure a constant supply of fresh blossoms until the first frost. Once you have brought those cuttings inside, knowing how to care for fresh cut flowers will help you enjoy the results of your labor for even longer.
Harvesting and Saving Zinnia Seeds for Next Year
There is a unique satisfaction in saving zinnia seeds. It is a simple act that connects you to the garden's natural cycle, turning this year's blooms into a free, endless supply of flowers for the next season. With a little patience, you can create your own custom blend of zinnias, perfectly suited to your garden.
Knowing When to Harvest the Seed Heads
Timing is critical for collecting viable seeds. A zinnia that is still vibrant and in full bloom is not ready. You must allow the flower head to mature and completely dry out on the plant.
Look for blooms that have lost their color and turned a brittle, brown. The petals will be withered, and the base of the flower head should feel firm and dry. This process takes several weeks after the flower’s peak, so you will need to resist the urge to deadhead a few of your best specimens, leaving them on the plant for this purpose.
Extracting the Seeds
Once a flower head is fully dried, snip it from the stalk. The seeds are the small, arrowhead-shaped tips attached to the base of each petal. The easiest way to extract them is to hold the dried flower head over a bowl and pull the petals out.
The result will be a mixture of seeds and dried floral parts, which is called chaff. It is not necessary to remove every piece of petal, but it is a good practice to clean out the larger pieces. A gentle method for this is to pour the seeds from one container to another in front of a small fan—the lighter chaff will be blown away.
Saving seeds is a tangible link to your garden's past and a promise for its future. By selecting seeds from your most beautiful and vigorous plants, you are actively curating the next generation of blooms, tailoring them to your unique garden aesthetic.
A Quick Note on Heirloom vs. Hybrid Seeds
It is important to know what type of zinnia you are growing, as it will affect the outcome of saved seeds.
- Heirloom Zinnias: These are open-pollinated, which means seeds saved from them will grow "true to type." The new flowers will resemble the parent plant, which is ideal if you wish to preserve a particular color or form.
- Hybrid Zinnias (F1): These are created by crossing two different parents. The seeds from these plants are genetically unstable. If you plant them, the results will be unpredictable. You will get a wide variety of flowers, many of which will not look like the parent plant. It can be an interesting experiment, but the outcome is not guaranteed.
Drying and Storing for Spring
Even though the seed heads felt dry on the plant, the seeds themselves require additional time to cure. Spread them out in a single layer on a paper plate or a screen and let them air dry for at least another week. Select a location that is cool, dry, and out of direct sunlight.
Proper storage is the final, crucial step. Once your seeds are completely dry, place them in a paper envelope or a small glass jar. Be sure to label it with the zinnia variety and the year. Store your seeds in a cool, dark, and dry place, and they will be ready for planting season.
Even the most seasoned gardener encounters occasional issues. With zinnias, the problems that arise are usually straightforward to diagnose and remedy. The key is early detection before a small problem escalates.
Most zinnia troubles can be traced back to environmental factors that are easily adjustable. From fungi to insect pests, knowing what to look for is half the battle.
Managing Powdery Mildew
The most frequent complaint regarding zinnias is powdery mildew. It appears as a white, dusty film on the leaves. While it is not typically fatal to the plant, it is unsightly and can weaken it. This fungus thrives in humidity and crowded conditions.
The best defense is good air circulation. When you first plant your zinnia seeds, pay close attention to spacing—provide 9 to 12 inches of room between plants. Also, make it a habit to water at the base of the plant in the morning. This practice keeps the leaves dry and allows the sun to evaporate any residual moisture, which mildew dislikes.
Dealing With Common Pests
Zinnias are resilient, but a few pests are attracted to them. Aphids, tiny pear-shaped insects, tend to congregate on new growth. Often, a strong jet of water from a hose is sufficient to dislodge them.
Japanese beetles can be a more significant nuisance. Their metallic green and copper shells are unmistakable, and they can skeletonize leaves quickly. For a home garden, the most effective method is to hand-pick them in the cool of the morning and drop them into a bucket of soapy water.
Prompt action is essential when it comes to garden pests. Identifying an issue and addressing it immediately is the difference between a minor annoyance and a full-blown infestation that can ruin your floral display.
Why Your Zinnias Are Not Blooming
It is incredibly frustrating to have a patch full of healthy green leaves but no flowers. If your zinnias are all foliage and no blooms, the cause is almost always one of two things: insufficient sun or the wrong type of fertilizer.
Zinnias require full sun, which means at least six to eight hours of direct, unfiltered sunlight every day. Less than that will result in spindly stems and very few blooms. If they are in a shady location, consider it a lesson learned and select a sunnier spot next year.
The other common culprit is too much nitrogen. A high-nitrogen fertilizer promotes vigorous, leafy growth but signals the plant to forgo flower production. Zinnias are not heavy feeders, so a conservative approach to fertilization is always best.
It is no surprise these flowers are garden staples. The global market for specialty flower seeds, including zinnias, was valued at USD 399.9 million and continues to expand. You can read more about these fascinating market growth trends on gminsights.com.
Your Zinnia Questions, Answered
Even experienced gardeners may have questions. Zinnias are wonderfully straightforward, but a few key details can make a significant difference. Here are the answers to some of the most common inquiries.
How Deep Should I Plant Zinnia Seeds?
This is a common error, but an easy one to correct. Zinnia seeds should only be planted about ¼ inch deep. Any deeper, and the small seedlings may exhaust their energy reserves trying to reach the surface.
Simply sprinkle a light layer of soil over them and gently pat it down. This simple step ensures the seed makes good contact with the soil, which is crucial for absorbing the moisture needed for germination.
Do Zinnias Really Need Full Sun?
Yes, they absolutely do. Zinnias perform best in a location that receives at least six to eight hours of direct sunlight every day. This is non-negotiable for achieving strong, sturdy stems and an abundance of blooms.
If they are planted in a shady area, they will become leggy and weak, stretching towards the light, and will produce far fewer flowers. Always allocate your sunniest garden space to them.
If your zinnias are all leaves and no flowers, the first thing to check is the sun exposure. It is the most common cause. Track the light in that location for a full day; you may find it is receiving less direct sun than you initially thought.
Why Are My Zinnia Seedlings So Tall and Thin?
This condition is known as "legginess." If your seedlings appear tall and spindly, they are not receiving enough light. It is their attempt to stretch and find a stronger source. This frequently occurs when starting seeds indoors on a windowsill that does not provide sufficient direct, overhead light.
The solution is to use a grow light if you are starting them inside. Provide 14-16 hours of light a day, keeping the lamp just a couple of inches above the tops of the seedlings. If they are already in the garden, ensure that taller neighboring plants are not casting a shadow over them.
Can I Grow Zinnias in a Pot?
Certainly. Zinnias are excellent for containers and can bring vibrant color to a terrace, balcony, or patio. The key is to select the right variety. Look for dwarf or compact types, such as the 'Profusion' or 'Zahara' series, which are bred to maintain a bushy, mounded habit.
Ensure you choose a pot with excellent drainage holes, as zinnias do not tolerate waterlogged soil. A container that is at least 8-10 inches in diameter provides adequate room for the roots to establish a healthy system.
For more inspiration on creating a luxurious lifestyle, from stunning gardens to the latest in Hamptons society, explore Social Life Magazine. Discover the people, places, and events that define upscale living at https://www.sociallifemagazine.com.
Author
Written by
Recent Posts
5 Most Trusted Psychiatry Providers in LA for Family Therapy
When Should You Replace Your Furnace? Top Signs Explained
Innotox 50 Units: A Modern Botulinum Toxin for Facial Aesthetics
Why E-commerce SEO Services are Essential for Online Retail Success
When You Should Choose A Denim Jumpsuit Instead
Categories
- 2025 Social Life Events
- Access to Digital + Physical Magazine
- Art
- Articles
- Beauty & Skincare
- Beauty & Wellness
- Business Strategy
- Celebrities
- Chronicles
- Design History
- Design History|Hamptons
- Design Process
- Design Trends
- Event Photos
- Events
- Family
- Fashion
- Fashion & Style
- Featured
- Food & Beverage
- Food, Spirits, Wine
- Hamptons
- Hamptons Celebrities
- Hamptons Design
- Health
- Health & Beauty
- Home & Design
- Home & Living
- Lifestyle
- Luxury Home Design|Design Process
- Luxury Home Design|Design Trends
- Luxury Home Design|Hamptons Design
- Luxury Home Design|Interior Design
- Luxury Lifestyle
- Luxury Living|Design Process
- Luxury Living|Hamptons
- Luxury Living|Hamptons Design
- Press
- Profiles
- Real Estate
- Technology
- The Chronicles
- Travel
- Trending
- Uncategorized
- Weddings
- Wellness