
Your hands do a lot of work every day. They grip steering wheels, haul bags, and dig through snack packs in the back seat. Over time, that daily wear can leave your nails brittle, peeling, or ragged at the edges. The good news is that healthy-looking nails rarely need expensive treatments or hours at a salon.
It mostly comes down to steady habits and a few reliable tools. This guide walks you through a simple care routine and a clean setup for home manicures. You’ll also learn how to pack a nail kit for travel and handle polish and gel the right way.
Start With a Simple Nail Care Routine
Strong nails start with basic care, not fancy products. Small habits, repeated often, make the biggest difference. Here are three areas to focus on first.
Keep Your Nails Clean and Dry
Moisture trapped under your nails can encourage bacteria to grow. Dry your hands well after you wash them, including the area under each tip. Frequent soaking also softens nails and can make them split more easily. Wear rubber gloves when you wash dishes or clean with harsh products.
Trim and Shape the Right Way
Dermatologists suggest cutting nails straight across, then gently rounding the tips. This shape helps your nails resist snags and breaks. When you file, move the file in one direction instead of sawing back and forth. That back-and-forth motion can weaken the edge and lead to splits.
Treat Your Cuticles Gently
Your cuticles act as a seal that helps keep germs out. If you cut them, you open a path for infection, so leave them intact. After a warm shower, gently push them back with a wooden orange stick. Finish with hand cream, and rub a little into your nails and cuticles too.
Set Up a Clean Space for At-Home Manicures
Many beginners do their own nails at home, and a dedicated corner helps. You don’t need much room. A small table, a comfortable chair, and a place to store your tools cover the basics.
Pick a Spot With Good Light and Airflow
Bright light helps you catch small details, such as polish flooding onto your skin. Fresh air matters too, since polish, removers, and acrylic liquids give off strong fumes. Set up near a window or a fan when you can. Wipe down your table and tools after each session to keep things clean.
Plan for Nail Dust
Your file creates fine dust as you shape, especially when you work with acrylic or gel. That dust settles on your table and drifts into the air you breathe. Many nail techs use a nail dust collector to pull particles away from the work area as they file.
Retailers that supply salons, such as F.O.X Nails USA, stock these machines for salons and at-home studios. Their range includes SHEMAX dust collectors, and every machine comes with a one-year warranty. You can compare current models in the dust collector collection only at F.O.X Nails USA. Look for a unit that fits your table and suits how often you file.
Build a Travel-Friendly Nail Kit
Road trips are hard on your hands. Car doors, heavy coolers, and dry air can chip polish and crack nails within days. A small kit in your glove box or carry-on lets you fix problems before they get worse. Pack these basics:
- Nail Clippers: A sharp pair lets you trim a torn nail cleanly before it catches on clothing.
- Glass or Fine-Grit File: A gentle file smooths rough edges without shredding the nail tip.
- Hand Cream: A travel-size tube helps fight the dryness that comes from air conditioning and sun.
- Cuticle Oil: A few drops each night keep your cuticles soft and less likely to tear.
- Clear Top Coat: A quick coat can seal a small chip and help your polish last a little longer.
Check your airline’s rules for liquids and tools before you fly. A clear zip bag also keeps everything together and easy to find at rest stops.
Learn the Basics of Polish and Gel
Polish adds color and a thin layer of protection to your nails. Your results depend largely on prep and patience. Follow these steps for a cleaner finish.
Prep the Nail Surface
Start with clean, dry nails that have no oil or lotion on them. Wipe each nail first, since oils can stop polish from sticking. A base coat gives color something to grip and may help reduce staining.
Apply Thin Coats
Thick coats take longer to dry and tend to bubble or smudge. Two thin coats of color usually look smoother than one heavy layer. Let each coat set before you add the next. Then seal everything with a top coat, and cap the free edge of each nail.
Cure Gel Polish Properly
Gel polish stays soft until you cure it under a UV or LED lamp. Follow the cure times in your product’s instructions for each coat. Some dermatologists recommend sunscreen on your hands or fingerless gloves during curing. These steps help limit UV exposure.
Remove Polish Without Damage
Never peel or pick off gel polish, since that can strip away layers of your nail. Instead, soak cotton pads in acetone, place them on your nails, and wrap each fingertip in foil. Once the gel softens, ease it off gently. For regular polish, use remover sparingly, because frequent use can dry out your nails.
Know When Your Nails Need Extra Attention
Good habits fix most everyday problems, but not all. Some nail changes point to something deeper. Watch for these signs:
- Color Changes: Dark streaks, yellowing, or white patches can signal a fungal infection or another issue.
- Pain or Redness: Tenderness and puffiness around the nail fold may point to an infection.
- Shape Changes: Nails that curl, thicken, or lift away from the skin underneath deserve a closer look.
- Slow Recovery: A nail injury that doesn’t improve over time should get checked.
If you spot any of these, see a dermatologist or your doctor. Early care can often prevent bigger problems later. Avoid covering the problem with polish until you know what’s going on.
Final Thoughts
You get healthy-looking nails from simple habits you repeat each week. Keep your nails clean and dry, trim them straight, and treat your cuticles with care. A tidy workspace and a small travel kit make good care easier to keep up.
Start with one or two changes this week, such as nightly cuticle oil or a new filing technique. Once those feel natural, add polish or gel at your own pace. Your nails grow slowly, so give your routine a few weeks to show results. With patience, you’ll see stronger, smoother nails that look good wherever the road takes you.
Author

Written by
Recent Posts

The Rise of Online Healthcare: Why Convenience and Privacy Matter More Than Ever
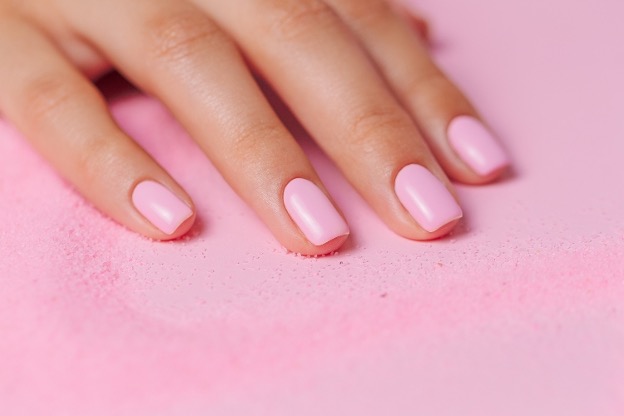
The Beginner’s Guide to Beautiful, Healthy-Looking Nails

Beyond the Beach House: A Fresh Take on Hamptons-Inspired Interiors

How Luxury Kitchen Design Is Redefining Entertaining In The Hamptons
Celebrating at Sea: The Case for a Short Cruise Getaway
Categories
- Art
- Articles
- Business of Luxury
- Celebrities
- Culture
- Entertainment
- Events
- Faces of Summer 2026
- Fashion
- Fashion & Style
- Featured
- Finance
- Food, Spirits, Wine
- Hamptons
- Hamptons Celebrities
- Health
- Health & Beauty
- Lifestyle
- Luxury Lifestyle
- Press
- Profiles
- Real Estate
- Technology
- The Chronicles
- Travel
- Uncategorized
- Weddings